6 minutes
Turning your Linux computer into a screencast station for pareto principle level professionality
(See video tour at the bottom of the post or here)
So I recently decided to record some of my coding sessions and put them on the internet. Why? Well, firstly it’s a good way to show what I can (and can’t) do. If I apply somewhere for a Data Scientist or Software Engineering position I can show what’s to expect from me. But of course it also serves the purpose of focus, as you tend to think your actions through when you are on record. So while recording yourself, you tend to explain exactly what you do and that helps in itself to generate better results (see ruber duck debugging).
Many YouTube personalities have crazy incomes and equally crazy equipment. Others (the long tail of the distribution) have barely any income and most of them tend to just do a quick tutorial or tips and tricks video with their webcam. Both worlds have advantages and disadvantages: The top tier streamers are a goal not worth aiming for. If you’re rational you don’t expect to become the 0.01%, especially not by doing tutorials on Linux and AI like me. But you can still try and get some quality into your videos to make them more enjoyable. So here are three core steps for doing so:
Hardware
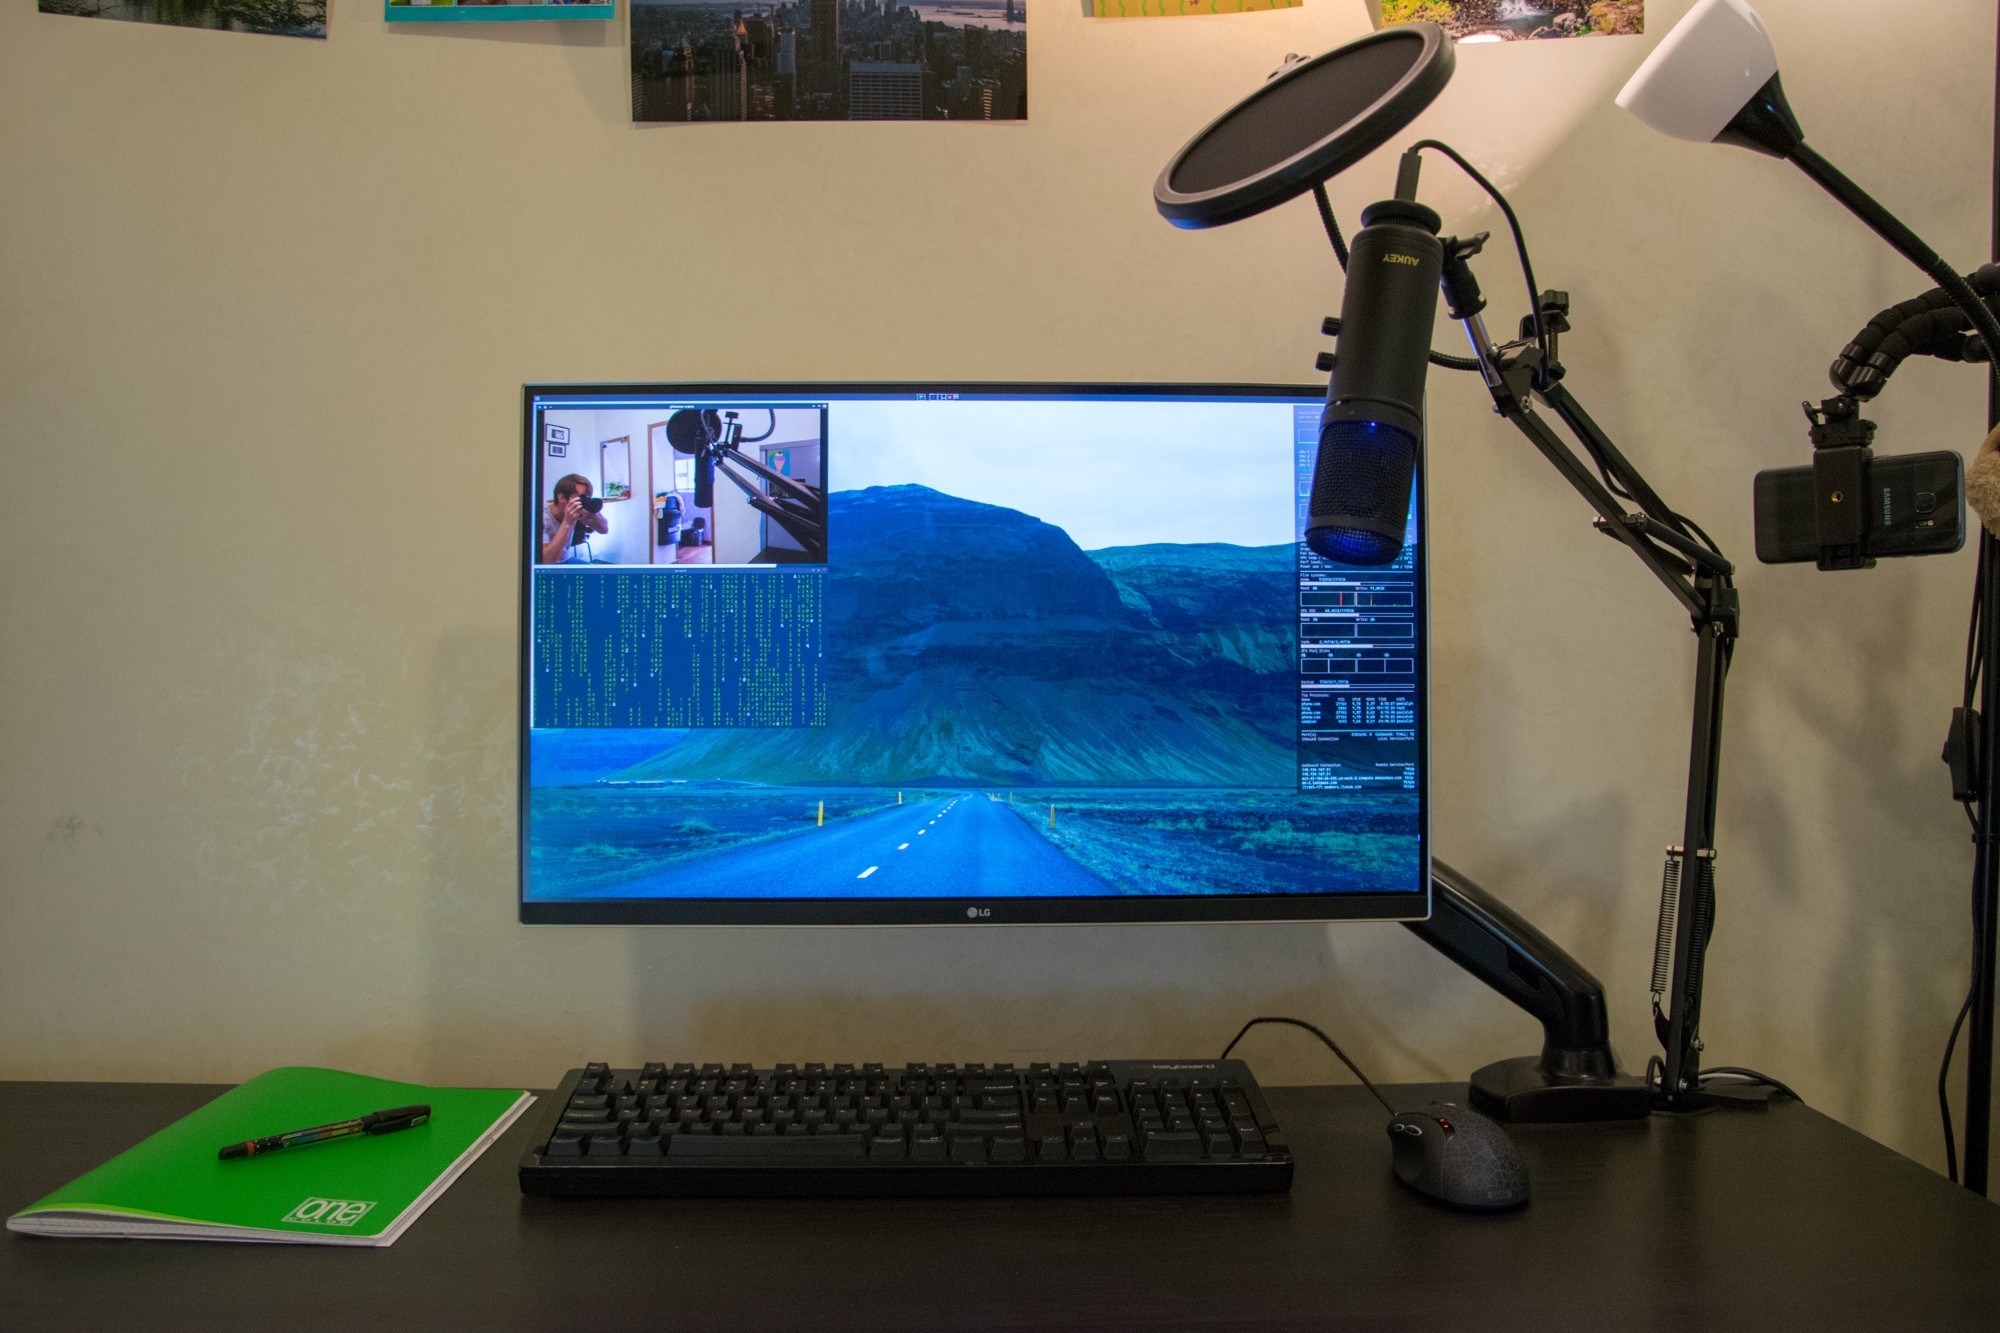
1. Get a good microphone
This doesn’t necessarily mean expensive. I just mean good. I mean better than your laptop microphone and I mean better than your phones. I got myself the Aukey MI-U1 which ran me around €60 and it feels and sounds solid. It’s a USB microphone so no connecting to studio equipment but for me it’s perfect. It’s a condenser and offers several controls. But I won’t repeat the specs page, here is what you should aim for:
- Adjustable output on mic → makes it easy to adjust volume without fiddling with system settings
That’s it. Lowcut filter? Do it in the Software. -10dB, sure nice but again, software. Unless you tend to really yell a lot. If your grandpa still has an old microphone in his office, ask him if you can take it. Get an adaptor for the thing and plug it into your Mic input. It’s probably even better, microphones have been good for the last 40 years, they’ve just gotten a lot cheaper since China happened.
2. Add a microphone arm for added space
When you take the standard microphone setup, it’s directly in front of you and you’ve got a cable running under your arm behind the keyboard and down the back. That’s both annoying and not ideal because that way the mic is very close to the keyboard. With a microphone arm, it’s much more variable to position and it’s about €16 to buy one of those. Plus the whole thing starts to feel really professional.
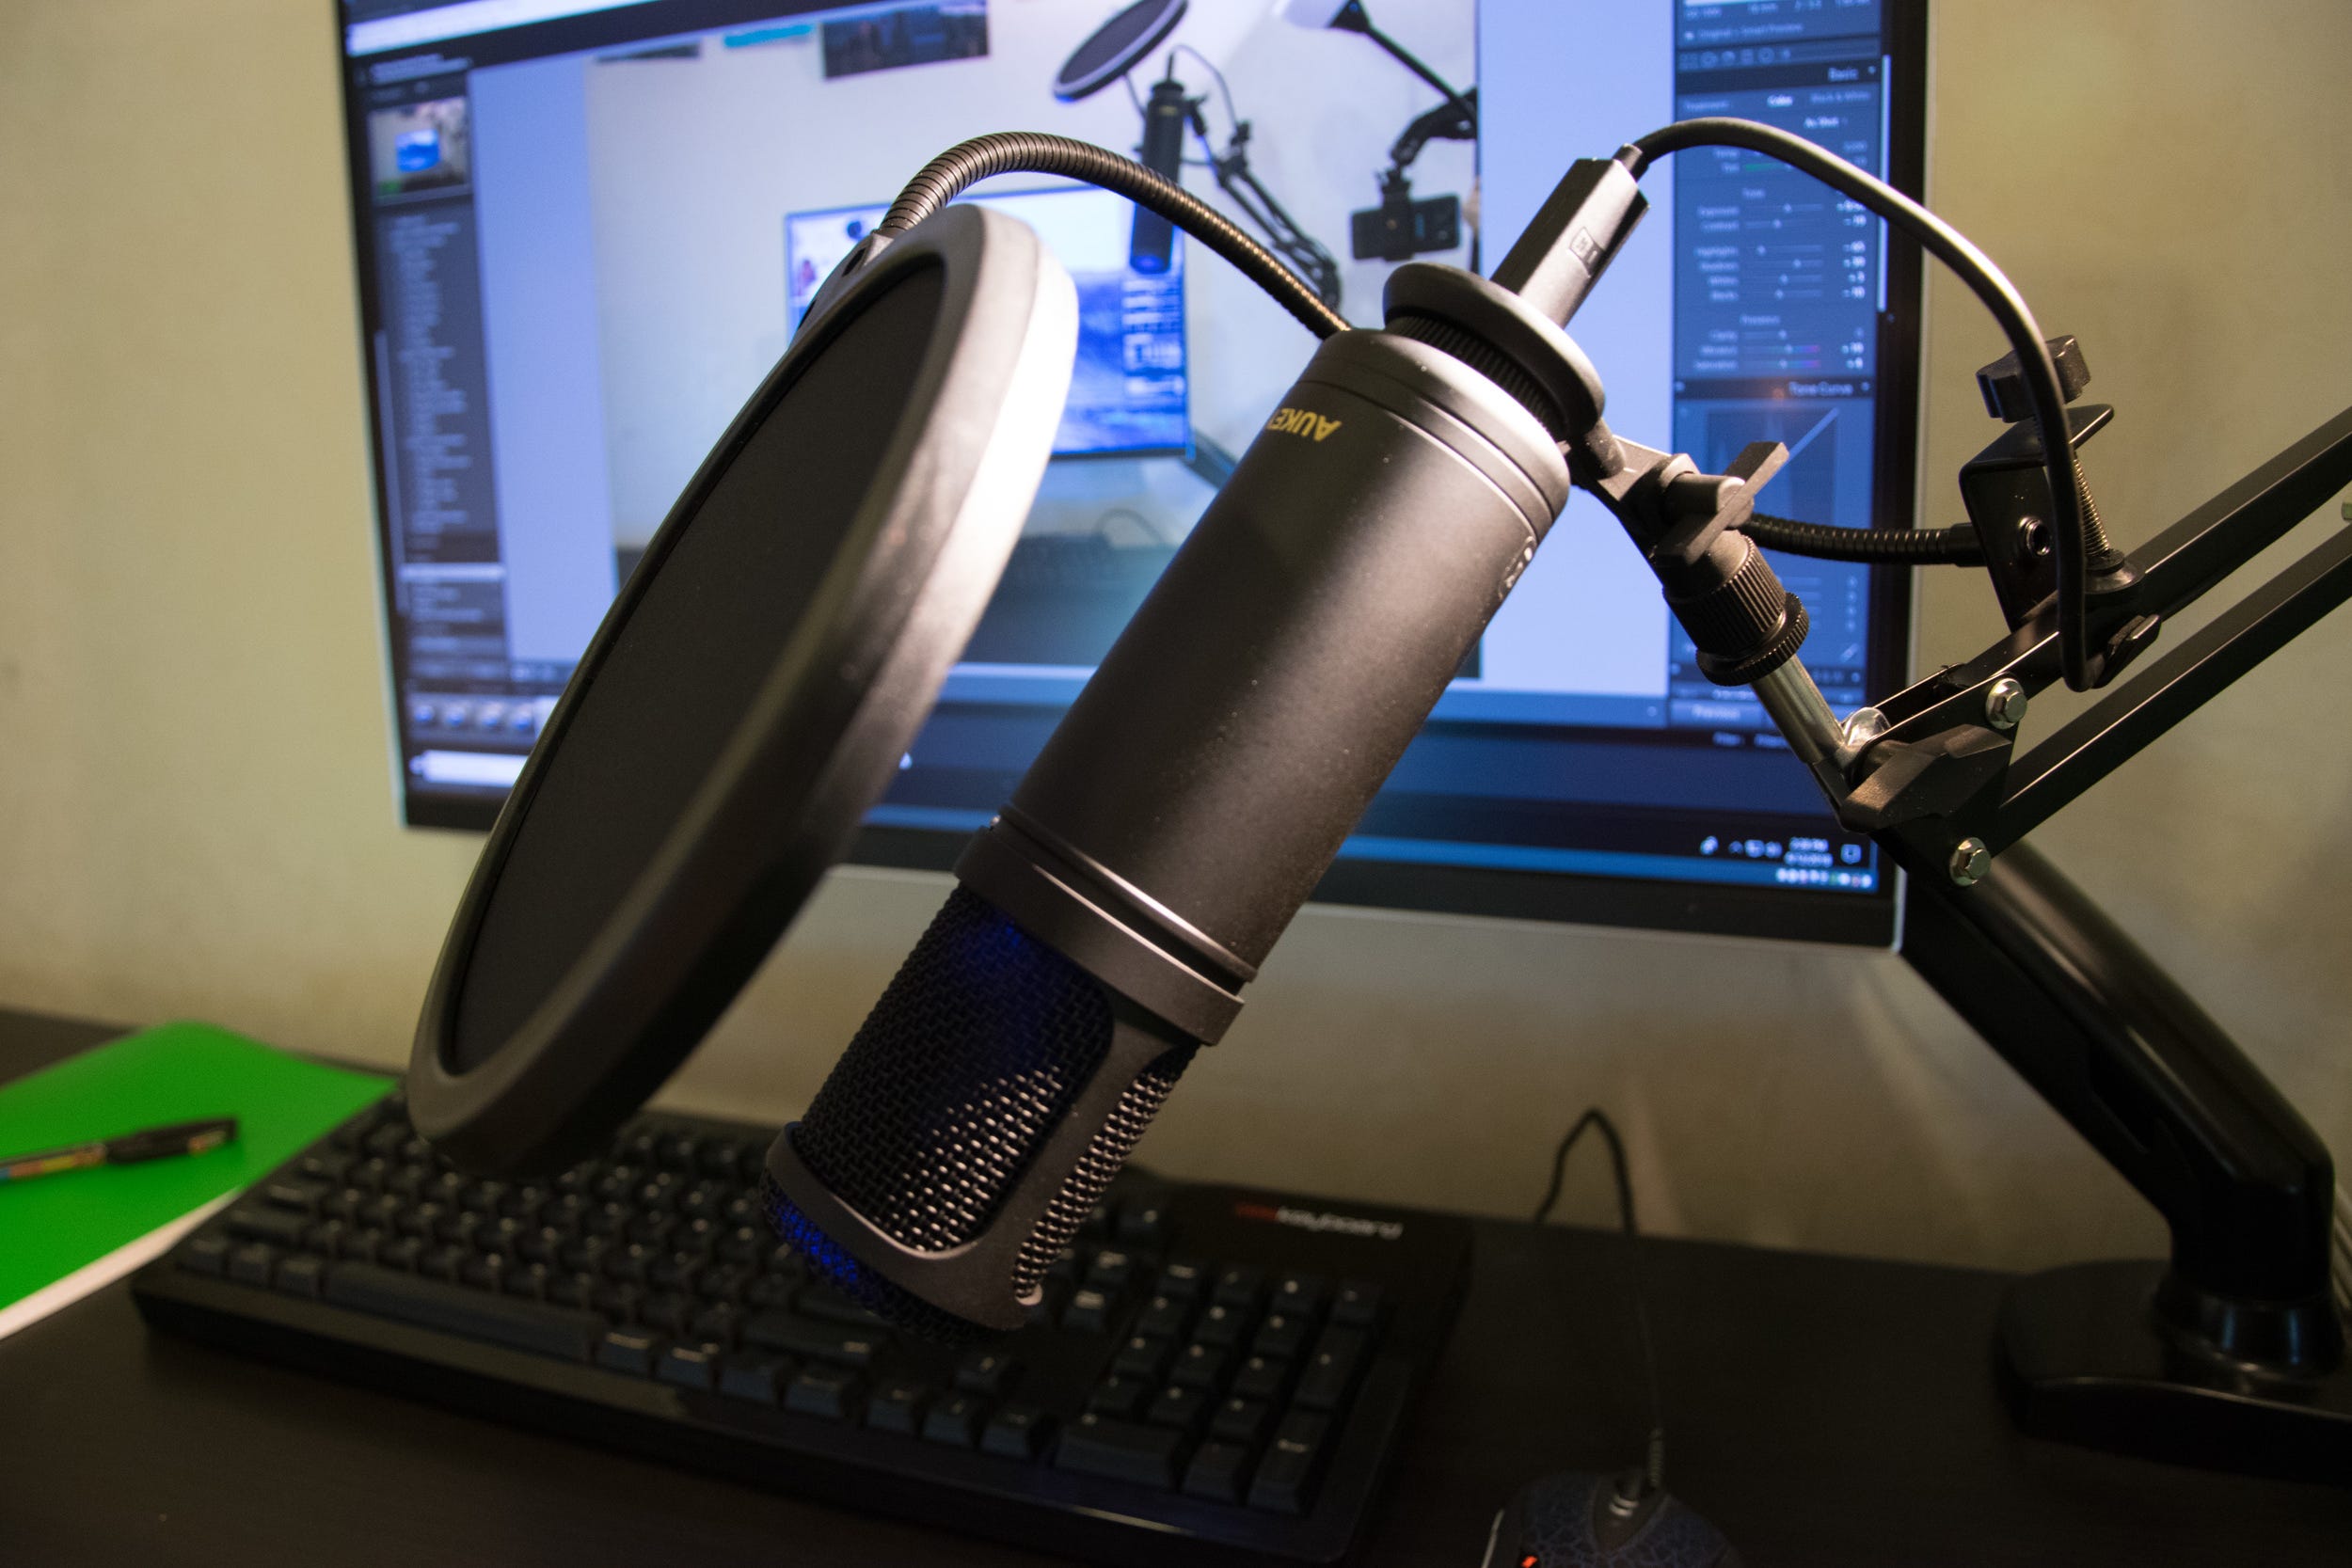 entry condenser mic with pop protection
3. Get a tripod for your camera phone
Come on, everyone has a smartphone. They’ve got great cameras. Use it! If you’re an iPhone owner, sorry. I wouldn’t know how to stream the cam recordings directly to the computer screen. But maybe you have a DSLR or even an old pocket camera lying around. Both will work as well but you can’t include the video stream directly inside the screen recording.
On Android however, we have a nifty little app called Camera Stream Wifi. It accesses your phones camera and creates a little http server that you can navigate to in your browser. The result is a nice camera feed. Wrap that with nativefier and you’ve got yourself a desktop app that uses your phones camera as a video source. I’ve got my window set to always on top, always visible so when I switch among desktops, I’m always in the bottom right corner of the video.
I attached my camera to the lamp next to my desk. The tripod can wrap around the pole neatly and the phone is not rocked by any movements of the desk which helps with the video quality. Probably around €10–15
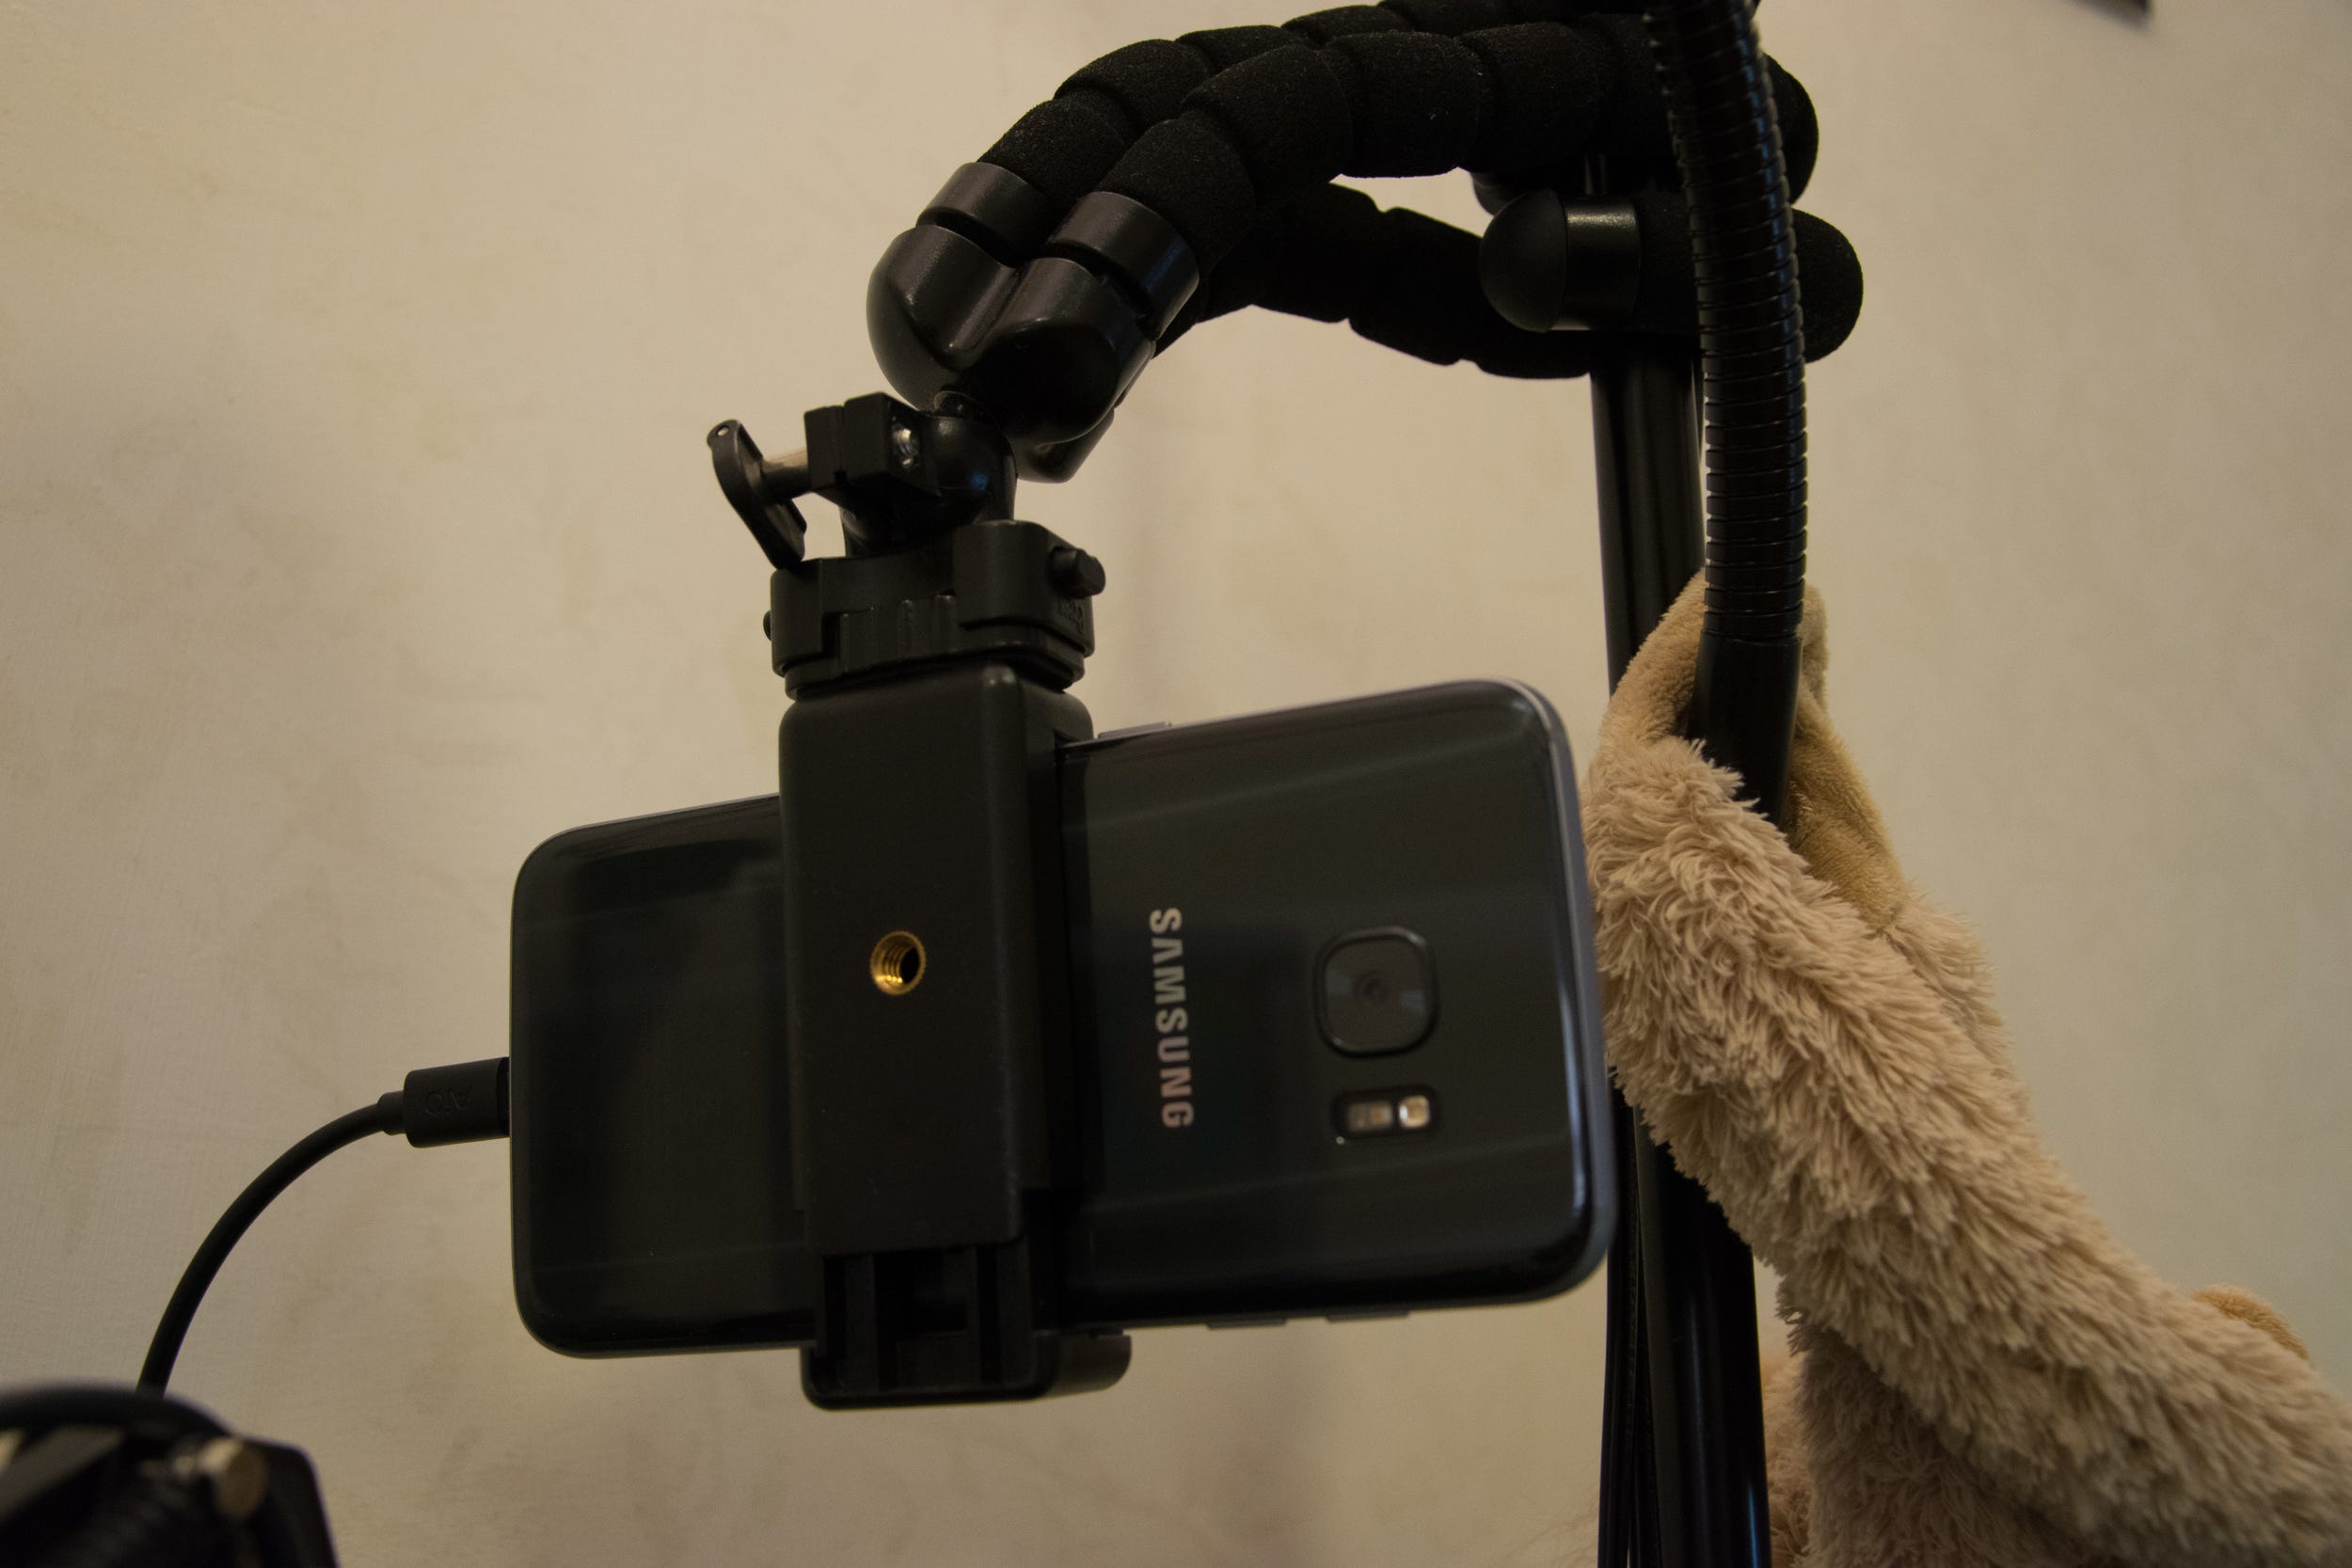 simple tripod with wrapping arms
Software
Wait you said 3 steps. Yes, well you can order all three things on Amazon right? That’s 1 step ;-)
Step 2: Get some software. I use:
-
**Audacity for audio editing: **Removing noise, increasing the bass a bit for a fuller sounding voice (which can compensate for not being really close to the mic, which leads to loss of low hertz frequencies) and normalizing the whole track to -2dB. You can also run the whole thing in one “Chain” and probably that will even work from the terminal. So maybe it’s all scriptable so you’d only have to run a shell script on your file.
-
SimpleScreenRecorder: To record the screen I use this. It allows for setting of a hotkey so I can quickly start and pause the recording. The whole thing is created as a single file or split at each pause, you can choose. There are surely more advanced versions but I like it. Simple, light, self-explanatory.
-
ffmpeg: I let SimpleScreenRecorder record the audio. That way it pauses both audio and video when I pause. I don’t intend to cut my video after the fact but just do them in one go with occasional pauses. ffmpeg allows to quickly split audio from video, edit it in audacity and merge them again
ffmpeg -i video.mp4 -c copy -an video_out.mp4 audio_out.mp3
#edit in audacity
ffmpeg -i video_out.mp4 -i audio_edited.mp3 -c copy upload.mp4
For the lazy here is the apt-get for the tools:
sudo apt install simplescreenrecorder audacity
Configure SimpleScreenRecorder
The thing works straight out of the box. But I like less FPS. I’m doing coding, most of the screen doesn’t move so there is no need for high FPS. Sure, if you do 3D things or anything where movement is a key factor, don’t go so low. I’m just trying to save bandwidth both on my upload and on the people that stream this stuff on their phones.
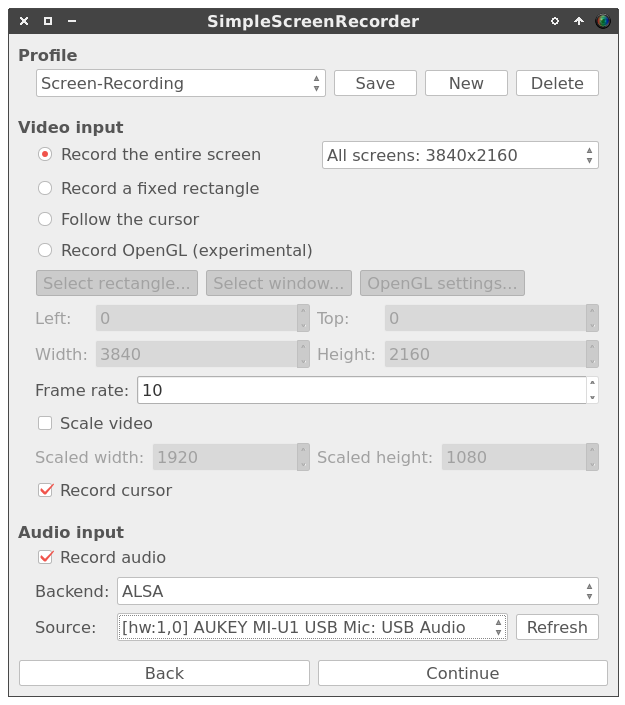 10 fps are enough for screencasts I believe. Jack them up to 30 or 60 if you feel like it
Mac and Windows
On the Mac you can just use Quicktime Player to do screen recordings. But there are also other alternatives out there, free and paid. On Windows I have no clue, I haven’t touched those in almost 10 years now. A quick search brought up sharex which looks and sounds legit. Give it a shot.
Prepare a short story and record
Take a notebook, write down your path on a piece of paper and go with that. A small script, however short it is helps to keep the whole story as it’s supposed to be. My first few recordings are completely free and I just uploaded one of them, because I was too embarrassed to upload the rest. Sure you can just record yourself do whatever but if you try to create a short video that teaches people something as efficiently as possible instead of just showing what you do, then make a script. After that, you’re good to go